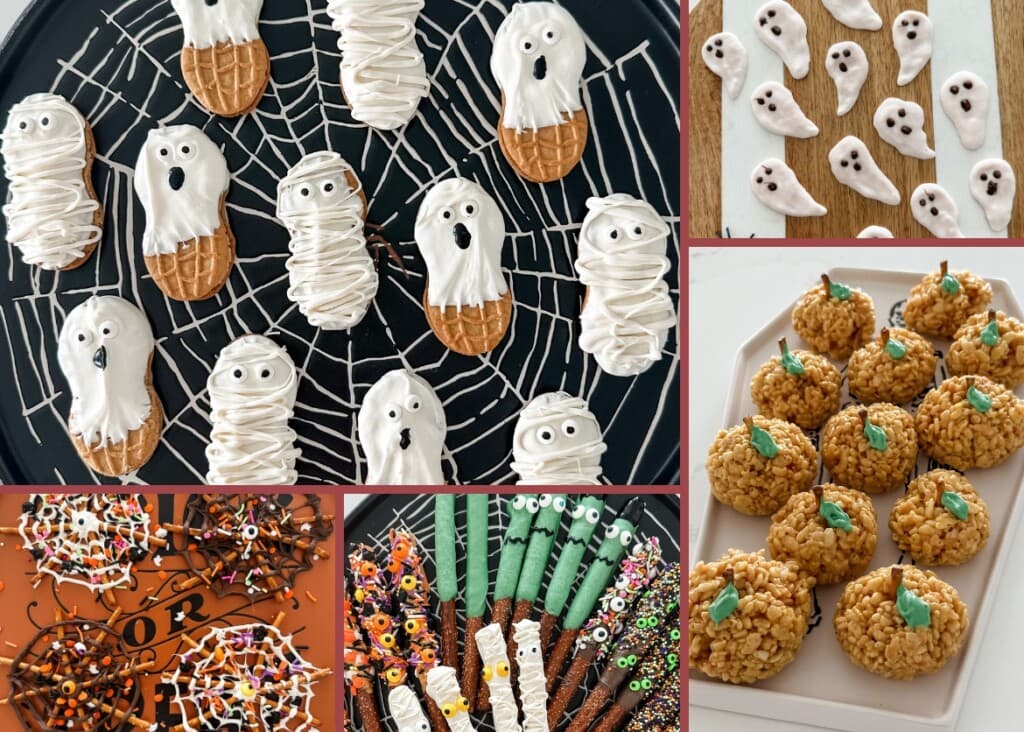
The spooky season is upon us! You’ll probably agree it’s a great time to mix up some fun in the kitchen for (or with) your kiddos. Enter some go-to Halloween treats every October, like Pumpkin Rice Krispies treats, Halloween pretzel rods, and more! These kid-approved Halloween snacks are festive, simple to make (all are no-bake!), and delicious. These easy Halloween treats are great for enjoying after school and serve as perfect Halloween desserts for bringing to a last-minute kids’ Halloween party.
Maybe you’re searching for quick Halloween dessert ideas that are easy enough to make for an entire crowd of goblins and ghouls — or perhaps you’re searching for adorable Halloween snacks to surprise your kiddos. We hope these recipes are a hit for you and your kids.
1. Nutter Butter Mummies & Ghosts
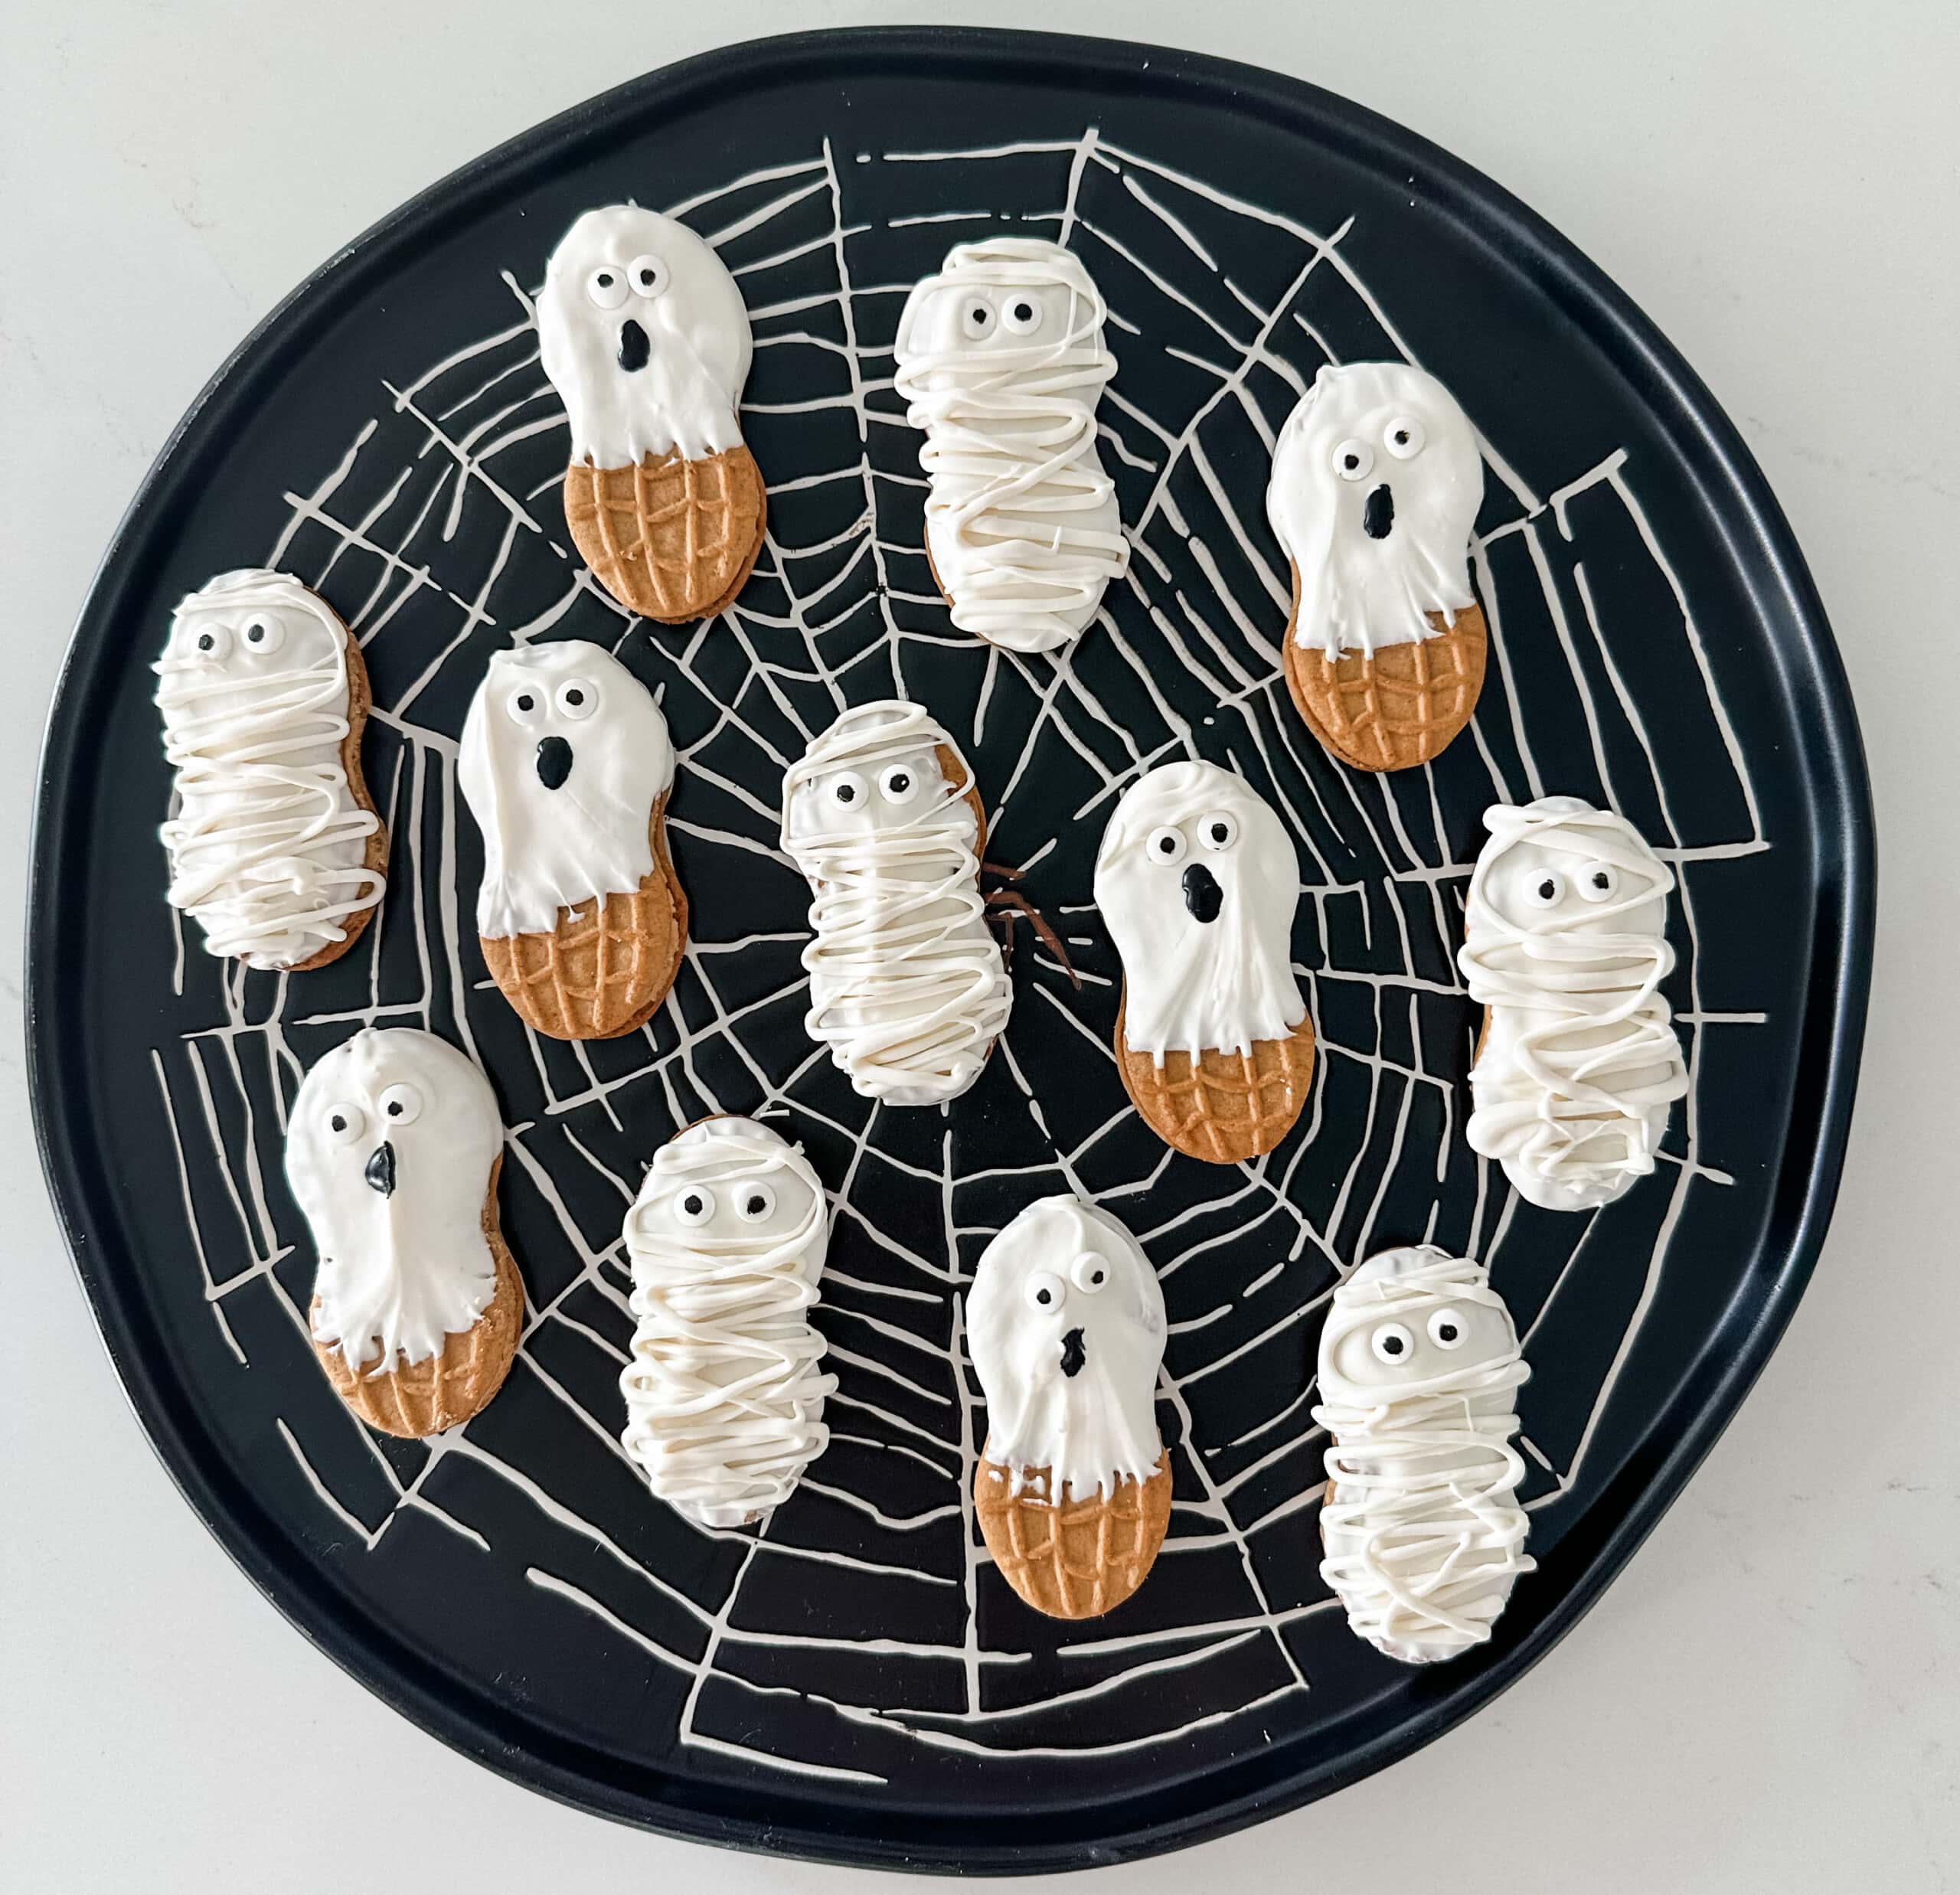
These Nutter Butter white chocolate-covered mummies and ghosts are a true crowd-pleaser! We’ve made them for a Halloween kids’ party and received so many compliments. They are super cute and incredibly simple to make. Please keep in mind that Nutter Butters do contain peanuts, so ensure your guests do not have a peanut allergy before making them.
Print
Nutter Butter Mummies & Ghosts
- Total Time: 20 minutes
- Yield: 24 cookies 1x
Description
A simple and sweet Halloween treat that is perfect for every age to enjoy! This one is a crowd-pleaser, so be ready for the compliments!
*Nutter Butters contain peanuts, so ensure your guests do not have a peanut allergy before serving.
Ingredients
- 1 pack Nutter Butter cookies
- 10 oz. white chocolate melts
- candy eyes
- black frosting
- ziplock bags
Instructions
- Place a sheet of parchment paper under a cooling rack.
- Melt your white chocolate melts in 30-second increments in the microwave or according to package directions, stopping to stir as needed. Do this until the chocolate is melted and smooth.
- For the ghosts, dip the Nutter Butters halfway into the melted chocolate one at a time, and place them on the cooling rack. For the mummies, fully dip the Nutter Butters into the melted white chocolate and place on the rack.
- Place the candy eyes where you prefer on the icing of each Nutter Butter to create mummies and ghosts. Make sure to do this before the chocolate fully dries and hardens.
- For the mummies: fill a ziplock bag with some melted white chocolate. Cut a hole in one corner of the bag to squeeze and drizzle out the white chocolate over the Nutter Butter to create a mummy look.
- For the ghosts: use the black icing to make a mouth below the candy eyes. If you don’t have a small icing tube, use a ziplock bag for this too.
- Let them sit in a cool, dry place for 15 minutes until they harden, and enjoy!
Notes
To avoid the cookies getting stale, after they have dried, store them in an airtight container and keep them in a cool, dry place (or your refrigerator). Enjoy them up to a week, or freeze for later!
- Category: Desserts
- Cuisine: American
2. Pumpkin Rice Krispies Treats
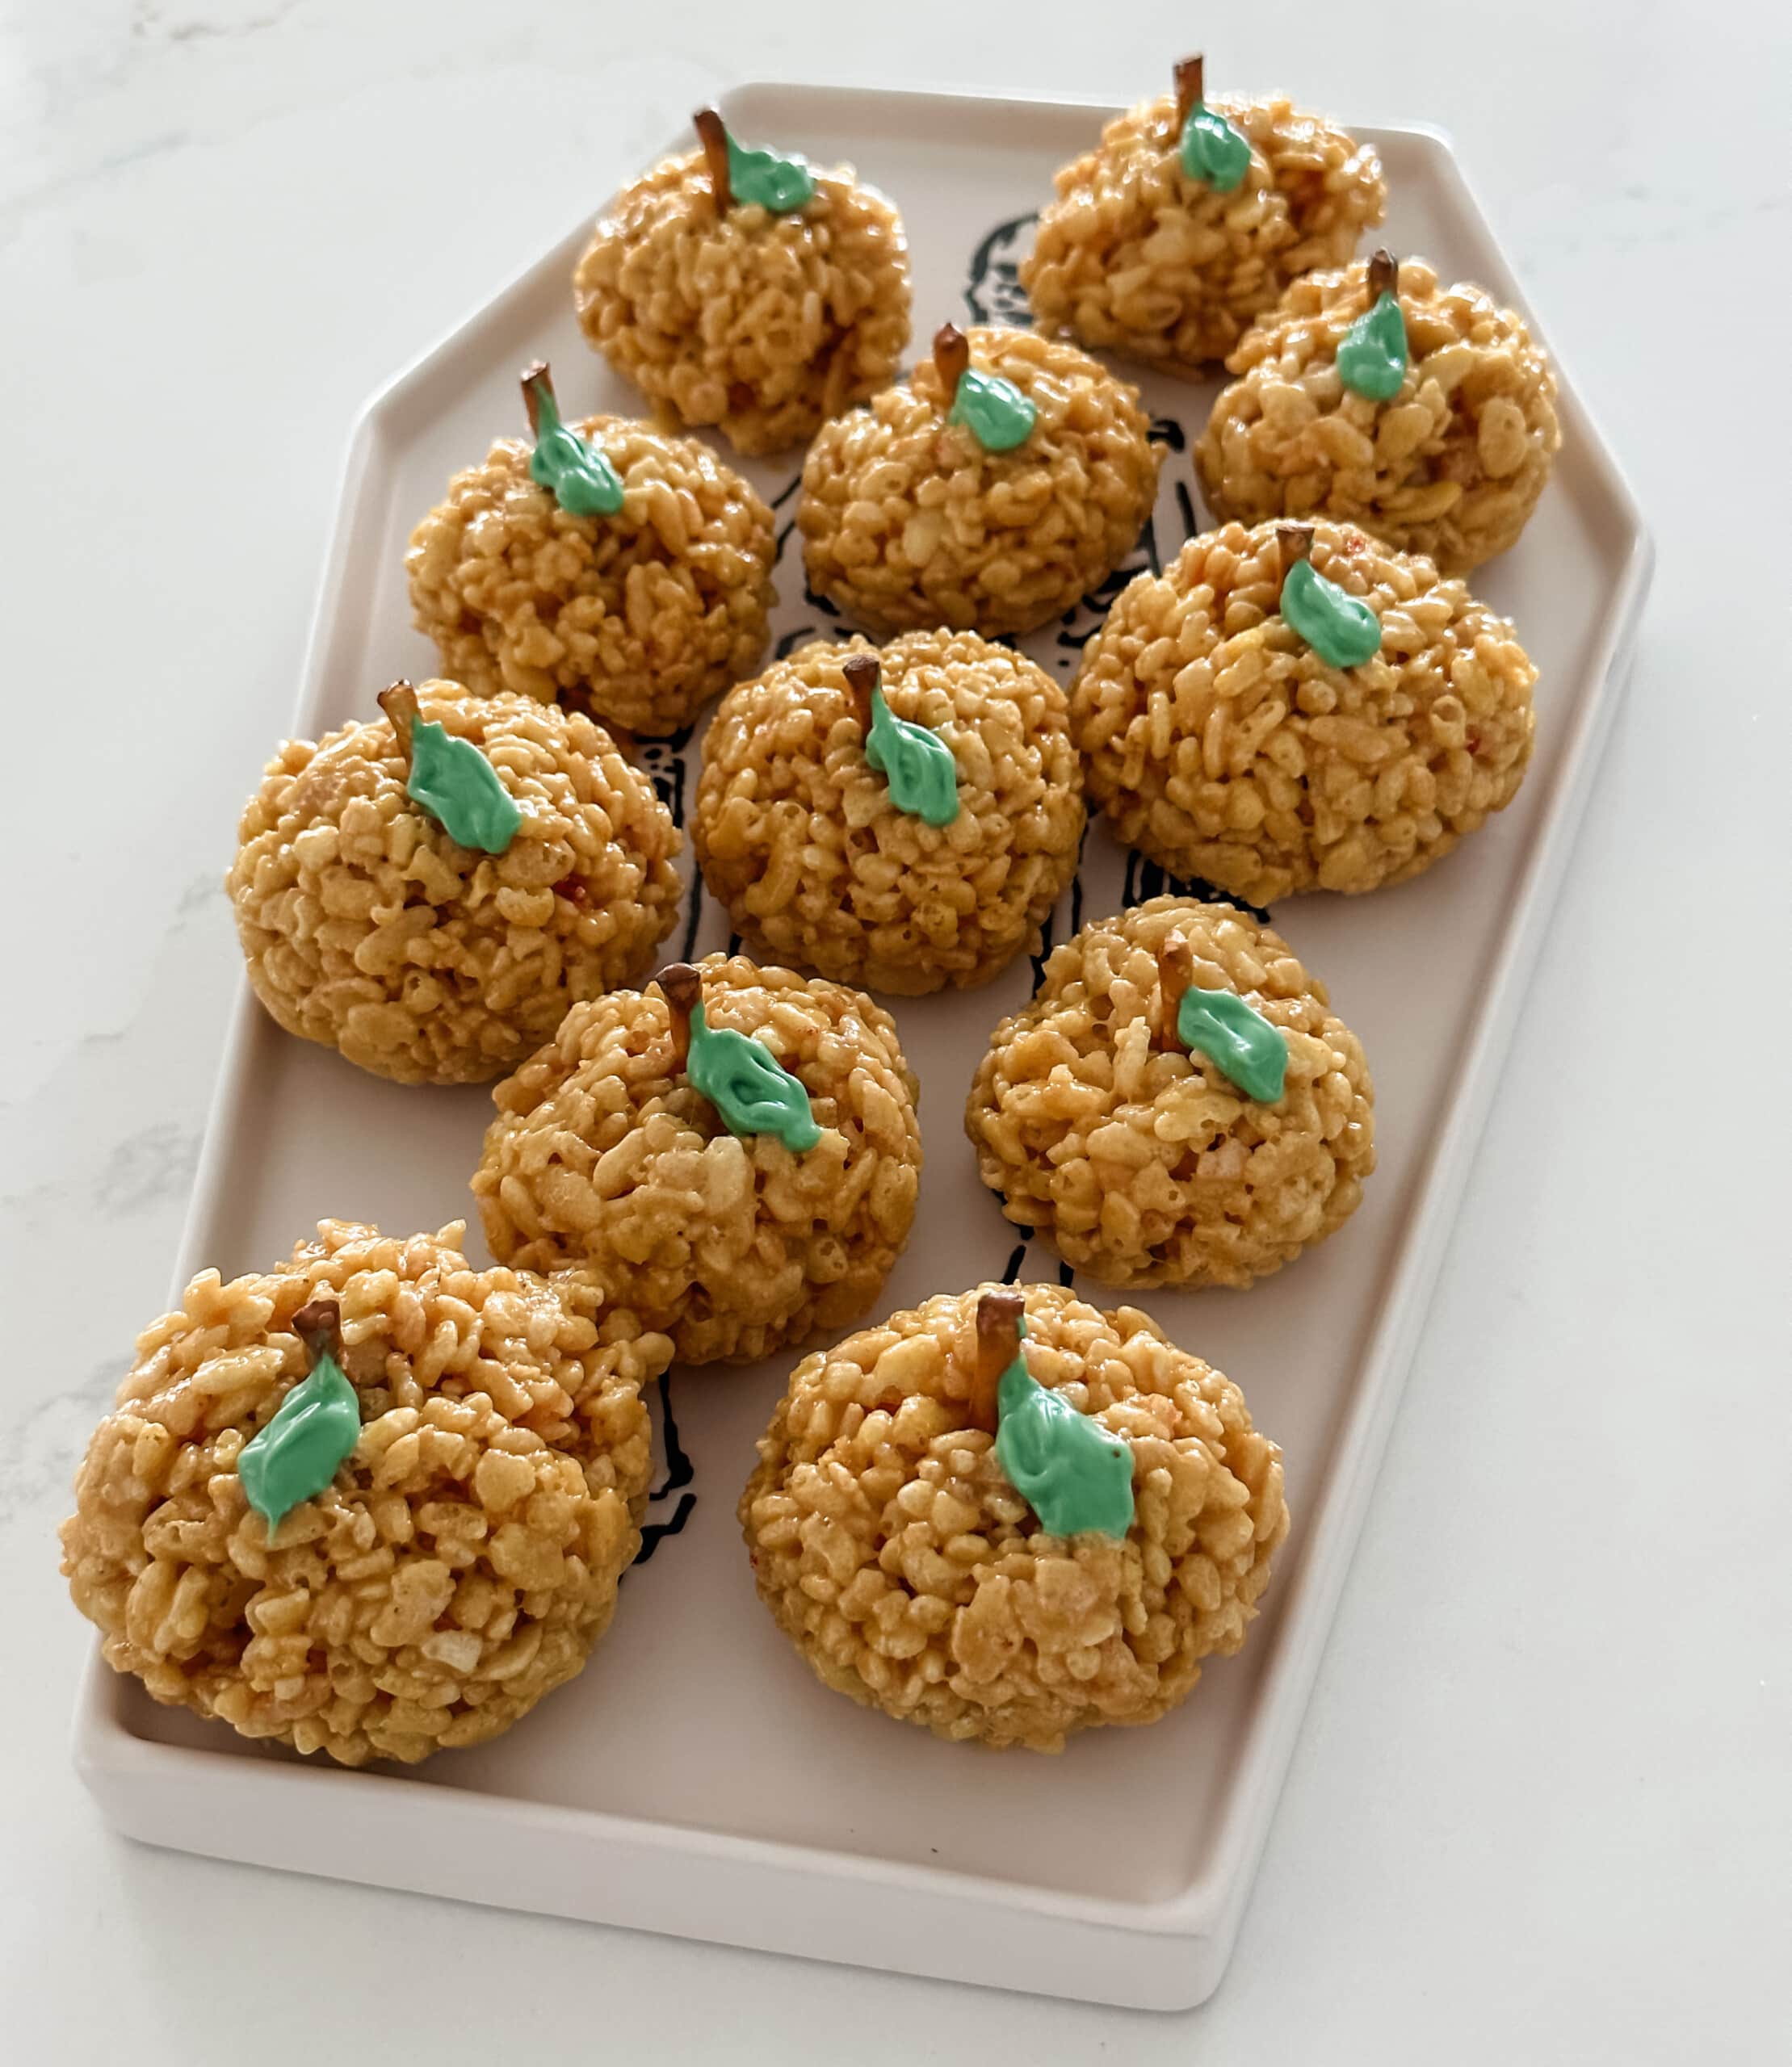
You can’t go wrong with this classic snack, but make it fall-oriented. Better yet: pumpkin! These Pumpkin Rice Krispies treats are an excellent option for school Halloween parties (double-check to ensure your ingredients are safe for allergies), get-togethers with family and friends, and even fall birthday parties. You can wrap them individually to be gifted as favors. This recipe makes about 12 treats.
Print
Pumpkin Rice Krispies Treats
- Total Time: 15 minutes
- Yield: 12 servings 1x
Description
This is a classic snack that you can’t go wrong with, but make it fall-oriented. Better yet: pumpkin! These Pumpkin Rice Krispies treats are a great option for school Halloween parties (double-check to ensure your ingredients are safe for allergies), get-togethers with family and friends, and even fall birthday parties. You can wrap them individually to be gifted as favors. This recipe makes about 12 treats.
Ingredients
- 10 oz. bag of marshmallows
- 5 cups of Rice Krispies cereal
- 4 tbsps. of butter, plus a bit extra for greasing hands
- orange food coloring
- pretzel rods, mini peanut butter cups, or Tootsie Rolls (your choice — these are for the stems)
Instructions
- Melt butter in a large, microwavable safe bowl.
- Add in marshmallows. Microwave in one-minute increments until melted.
- Mix in orange food coloring until you reach your favorite shade of pumpkin.
- Add Rice Krispies into the mixture and stir until mixed well.
- With lightly greased hands, break apart and shape the Rice Krispies mixture into 2-inch balls.
- Place a pretzel rod, Tootsie Roll, mini peanut butter cup, or other “stem” of your choice on top of each pumpkin treat.
- Let set for about an hour and enjoy!
Optional: Add some green frosting or icing to make a “leaf” on the stem.
- Category: Desserts
- Method: Microwave
- Cuisine: American
These can also be made on the stovetop if you prefer. Using the microwave is a bit more toddler-friendly. My 2-year-old loves helping in the kitchen and can easily join me on her learning tower to pour and mix ingredients, press microwave buttons, etc. Whichever route you choose, these Halloween treats are sure to be devoured.
3. Pretzel Spiderwebs
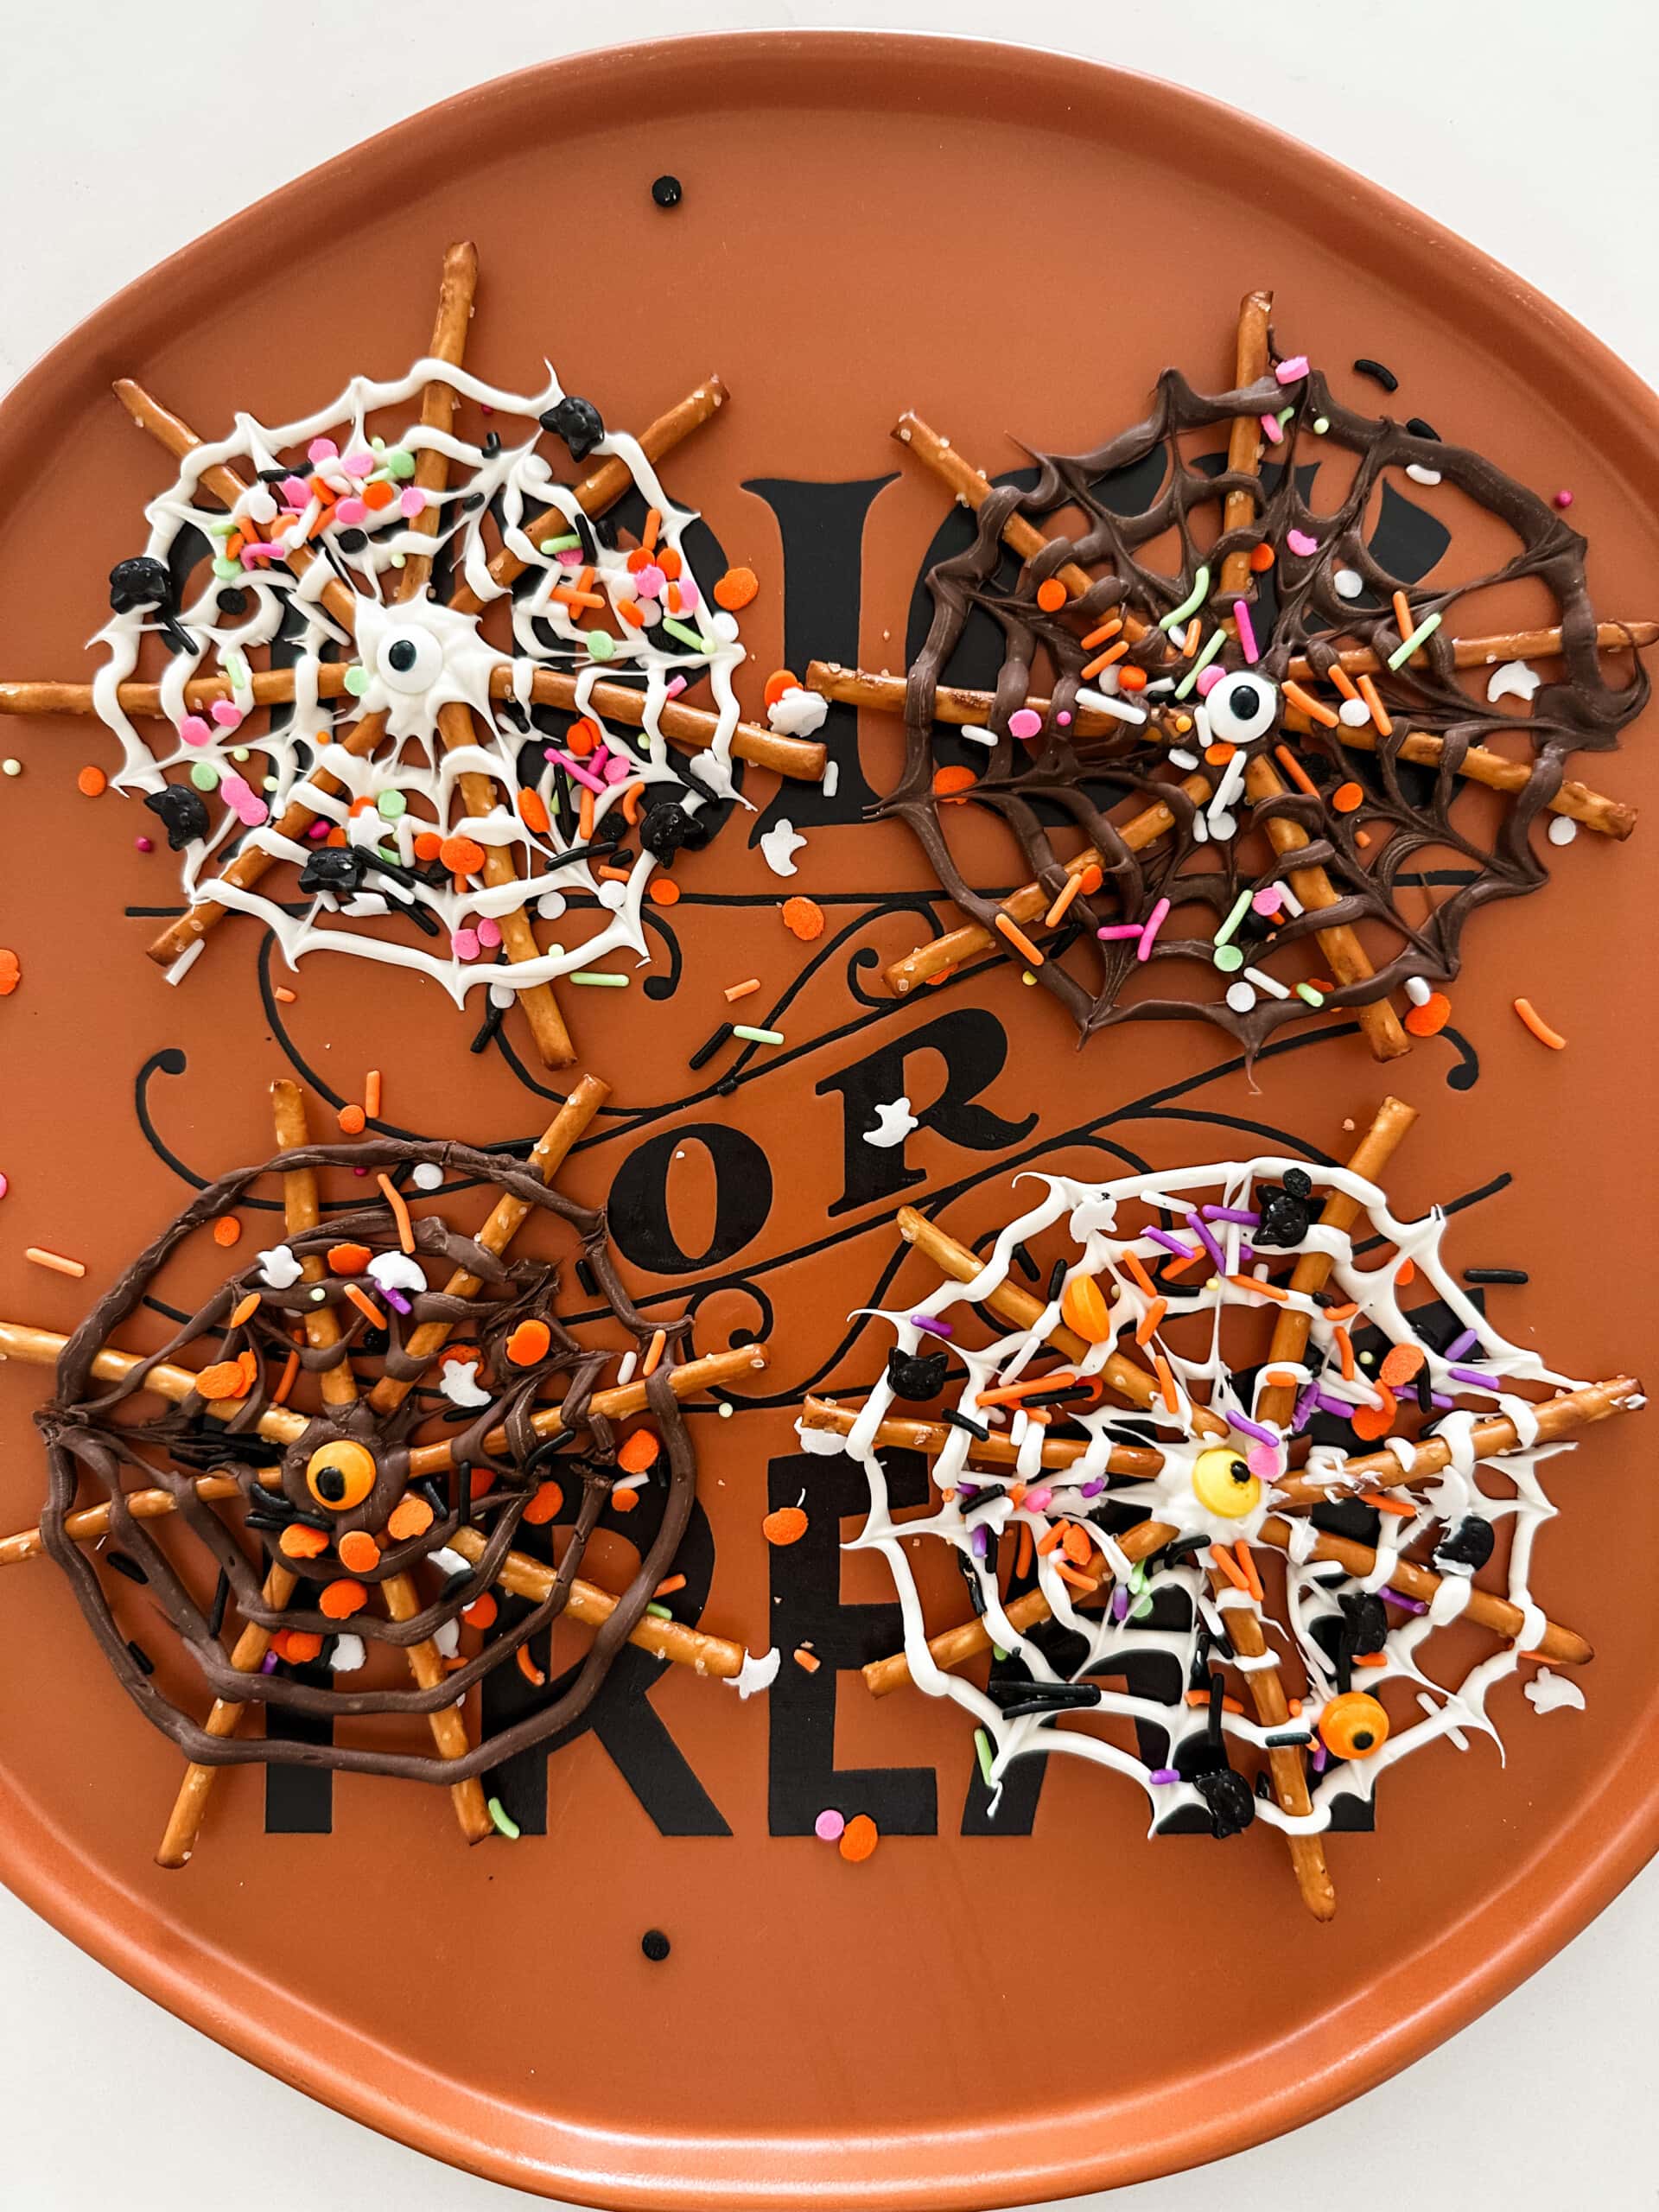
A fun and tasty way to make spiderwebs this Halloween! These Halloween Spiderweb Pretzel treats perfectly combine salty and sweet, creamy and crunchy. We love how they’re so simple to make (requiring only three ingredients) that the kids can even join in making them! It’s a perfect Halloween treat to bring to a teacher, neighborhood party, and more.
Print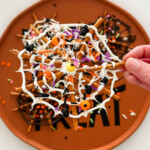
Spiderweb Pretzel
- Total Time: 30 minutes
- Yield: 20 servings 1x
Description
These spooky-cute pretzel spider webs feature crunchy pretzel sticks, drizzled chocolate, and festive sprinkles. They’re sure to be a popular dessert with your kids this Halloween!
Ingredients
- bag of pretzel sticks
- 10 oz. white chocolate melts
- 10 oz. milk chocolate melts
- festive Halloween sprinkles
- candy eyes
- toothpick
- ziplock bags
Instructions
- Begin by melting your chocolate melts in a microwaveable bowl (one bowl for the white chocolate and another bowl for the milk chocolate). Follow the melting directions according to the package or in 30-second increments (do not overheat). Stir until smooth.
- While heating the chocolate, lay a sheet of parchment paper on a baking sheet and place 8 pretzel sticks to create a circular shape. The ends of each pretzel stick should be touching in the center and pointing outwards.
- Once the chocolate is melted and smooth, transfer it to a ziplock bag. (If you choose to do milk chocolate and white chocolate, place them in separate ziplock bags.) Cut a small hole at the corner end of the bag and pipe a circle in the center of the pretzels where they meet. Starting at the center and working outwards, pipe another circle and another. You should be able to do several rings depending on how far apart you want each to be. Stop just before reaching the tips of the pretzel sticks, so they stick out a little from the outermost ring. This should achieve a spiderweb look and will help bind the pretzels together.
- Grab a toothpick and run it through the chocolate rings starting from the center of the web outward. Do this all around the circle to help create more of a spiderweb appearance.
- Decorate the spiderwebs however you’d like! Use your festive Halloween sprinkles and have fun.
- Allow your pretzel spiderwebs to dry for 30 minutes or until completely set. Then, carefully peel them from the parchment paper and serve.
- Category: Desserts
- Cuisine: American
4. Halloween Pretzel Rods

With so many Halloween treats made purely of sugar, it’s always nice to have a recipe that combines the perfect amount of salty and sweet. These pretzel rods do just that. They require only three ingredients and allow for a lot of creativity. This recipe makes about 25 pretzels.
Print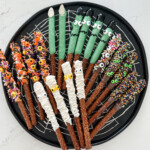
Halloween Pretzel Rods
- Total Time: 30 minutes
- Yield: 25 servings 1x
Description
With so many Halloween treats being made purely of sugar, it’s always nice to have a recipe on hand that combines the perfect amount of salty and sweet. These pretzel rods do just that. They require only three ingredients and allow for a lot of creativity.
Ingredients
- 12 oz. package of thick pretzel rods
- 10 oz. bags of melting wafers/candy melts of your color of choice
- toppings of your choice: sprinkles, candy eyes, black icing, almond slices, etc.
Instructions
- Cover a baking sheet with parchment paper.
- Melt your candy wafers in 30-second increments in the microwave, stopping to stir as needed. We recommend using tall, microwavable mugs for easier dipping or medium-seized bowls for melting the wafers. Do this until all wafers are melted and smooth.
- Dip pretzels in melted wafers one at a time, covering as much or as little of the pretzel as you’d like. Leaving about ⅓ of the pretzel uncovered is great for no-mess handling.
- Top the melt-covered portion of pretzels with sprinkles and candy eyes. You can do this by rolling the pretzels in a sprinkle-filled plate or by tossing/shaking/placing sprinkles on the pretzels. Get creative here! You can add an almond slice to make it look like a fingernail, or use some black icing to create a Frankenstein. If you’re making these with your kiddos, encourage them to decorate their Halloween treats however they see fit.
- Lay your completed pretzels on the parchment paper-lined baking sheet. Let them sit for 10-15 minutes to set before enjoying.
- Store in a cool, dry place (or your refrigerator) for up to a week, or freeze for later.
Notes
While sprinkles are all you need to take regular, melt-covered pretzels up a notch for the holiday, you can also experiment with fun toppings such as candy corn, Halloween-colored M&Ms, and other candies of choice.
- Category: Desserts
- Cuisine: American
5. Yogurt Melt Ghosts
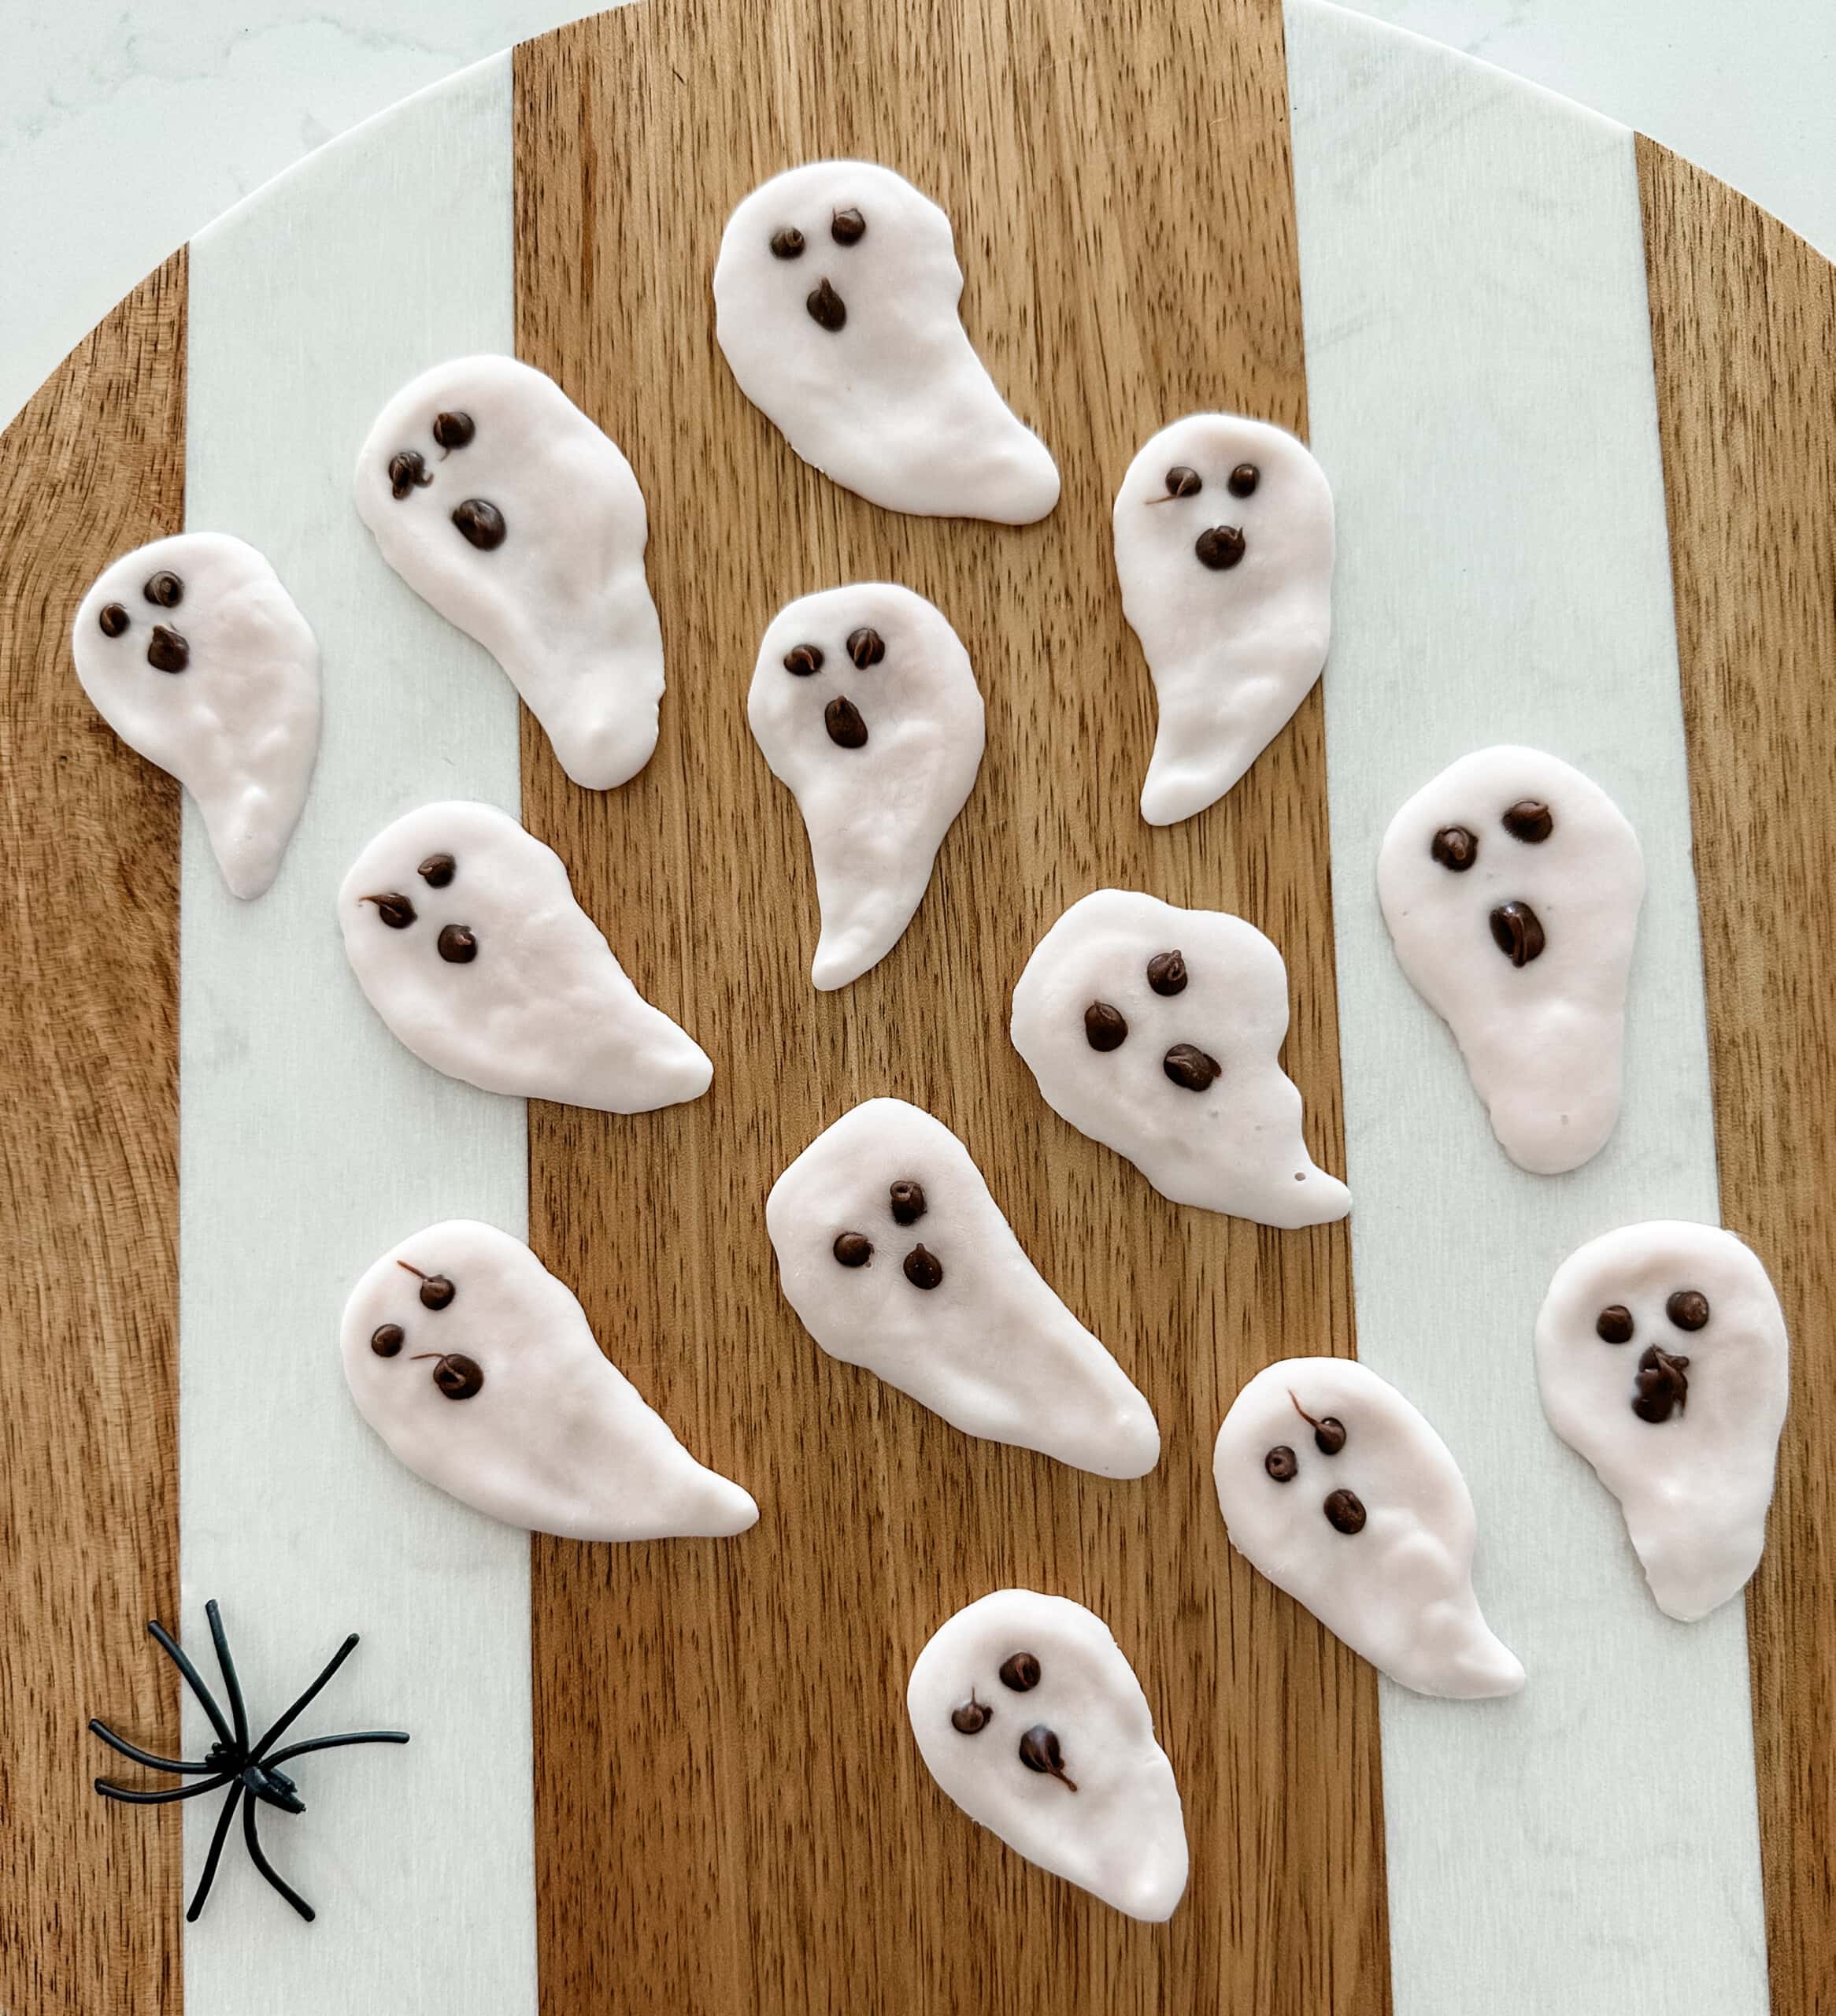
This Halloween treat recipe is so simple to make! It only requires two ingredients, and we love how it can be enjoyed by everyone in the family, even our tiniest ones (as long as they are eating solids). Instead of using white chocolate for the ghosts, we switched it out with yogurt for a healthier alternative. It’s a perfect Halloween treat for kids!
Print
Yogurt Melt Ghosts
- Yield: 12 servings
Description
The perfect healthy Halloween treat that even our little ones can enjoy! These yogurt melt ghosts are creamy, sweet, and so simple to make. If you have a baby that is eating solids, this is the Halloween dessert we recommend making for them!
Ingredients
- yogurt, preferably white in color (yogurt pouches make it even easier to squeeze into ghost shapes)
- small package of milk chocolate melts
- Optional: candy eyes
Instructions
- Line a baking sheet with wax or parchment paper.
- Open a pouch or tube of yogurt and squeeze the yogurt out into several circles onto the wax paper.
- Use a spoon to spread and create ghost shapes with the yogurt.
- Warm up the chocolate melts according to the package directions or in 30-second increments. Stir until smooth.
- Transfer the chocolate into a ziplock bag and cut a hole at the corner end of the bag. Then, pipe the eyes and mouth on each ghost. (You can use candy eyes if you prefer for the eyes.)
- Transfer the baking tray into the freezer and let them freeze for at least 2 hours or until the yogurt ghost melts are frozen solid.
- Serve and enjoy immediately (the yogurt melts fast!)
Notes
Do not use candy eyes for children under the age of two years old. These small candies could cause choking.
- Category: Desserts
- Method: Chill
- Cuisine: American
6. RIP Coffin Ice Cream Sandwiches

Speaking of easy, I don’t think it gets much easier than this spooky cute Halloween treat! These RIP coffin ice cream sandwiches were a hit with my kiddos. This option can’t sit out for long, or the ice cream will melt, so if you’re looking for a quick Halloween treat for the family to enjoy, go with this recipe!
Print
RIP Coffin Ice Cream Sandwiches
- Total Time: 10 minutes
Description
These coffin-shaped ice cream sandwiches will knock ’em dead! In the best way possible, of course. 😉 With two simple ingredients, this Halloween treat is the perfect after dinner dessert for all to enjoy.
Ingredients
- rectangular-shaped ice cream sandwiches
- black decorating gel
Instructions
- Remove the wrapping from the ice cream sandwiches that you want to prepare and line them on your plate or cutting board.
- Cut the corner edges off of each ice cream sandwiches into a coffin shape. It’s like a diamond but without the pointed corners on the top and the bottom. (Eat the scraps!)
- Write “RIP” in the center of the ice cream sandwiches using the black decorating gel.
- Share and enjoy quickly!
Notes
I used Blue Bell mini vanilla ice cream sandwiches for my recipe for smaller sized treats, but you can use any rectangular ice cream sandwich and any flavor for this recipe.
Remember that ice cream melts, so quickly serve this quickly after it’s prepared!
- Prep Time: 10 minutes
- Category: Desserts
- Method: Chill
- Cuisine: American
7. Monster Rice Krispies Treats
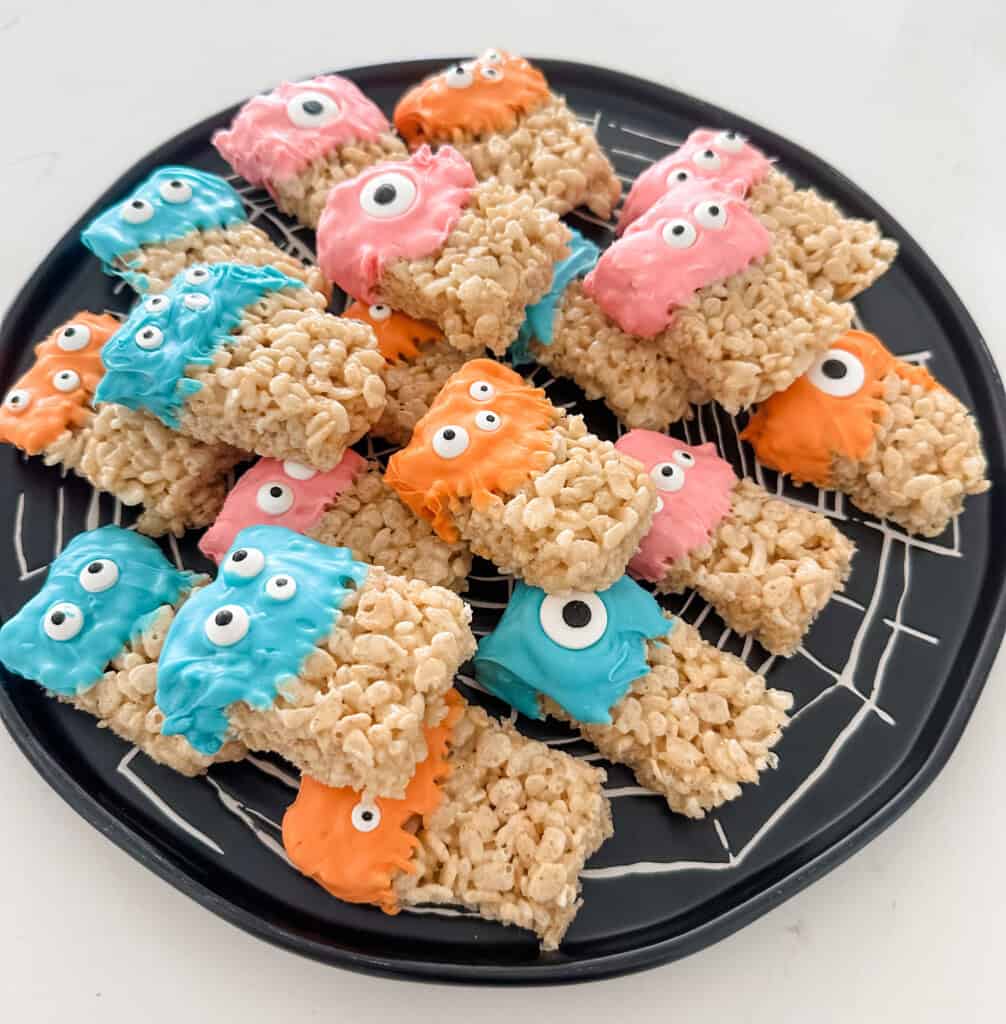
These are some of the cutest (and tastiest) monsters we’ve ever seen! We made this recipe and shared some with our neighbors. They were loved and devoured by all. These Monster Rice Krispies treats are the perfect thing for a Halloween party or to wrap up and give as gifts to the kids’ teachers, classmates, and friends!
Print
Monster Rice Krispies Treats
- Total Time: 1 hour 15 minutes
- Yield: 21 servings 1x
Description
Monstrously delicious and oh so fun Rice Krispies treats!
Ingredients
For the Rice Krispies treats:
- 6 cups Rice Krispies cereal
- 1/4 cup butter
- 1/2 tsp vanilla extract
- 1 large bag marshmallows
For the Monster coating:
- candy melts (pink, blue, orange)
- candy eyes (multiple sizes)
- cooking oil
Instructions
For the Rice Krispies treats:
- Spray your 9″ x 13″ baking pan with cooking spray.
- Get a large pot and melt your butter on low heat until completely melted.
- Add in the marshmallows and continuously mix until they are completely melted and combined with the butter.
- Remove the pot from the heat and add the vanilla extract and the Rice Krispies cereal. Stir to combine.
- Spray a silicone spatula with cooking spray and use to pour the mixture into your greased baking pan. Continue using the spatula to gently press down and evenly distribute the Rice Krispies all throughout the pan.
- Allow the Rice Krispies to cool at room temperature until firm.
- Once firm, cut them into little rectangles. (We cut 21 rectangles.)
For the Monster coating:
- Melt approximately 1 cup of candy melts in a small bowl in the microwave at 50% power for 1 minute or at full power for 30-45 seconds. Stir and then continue microwaving at 50% power for 30 seconds or for 15 seconds at full power at a time until completely melted. (You can check the packaging instructions as well.)
- Optional: Add approximately 1/2 teaspoon to 2 teaspoons cooking oil for a smoother finish. (The more you add, the smoother the finish and the longer the candy melts take to harden on the Rice Krispies, so go slowly!) Stir to combine.
- Dip a quarter or half of the Rice Krispie treats into the candy melts and set on parchment paper.
- Place candy eyes into the coating to create your monster faces. Press the eyes gently into the candy melt coating to help create the appearance of eyelids around the candy eyes.
- Allow to cool at room temperature until the candy melts have completely hardened on the Rice Krispies treats (approximately 30 mins).
Notes
You can use pre-made Rice Krispies treats, but we think homemade ones are even better! But this is good to know if you are in a time crunch.
- Category: Desserts
- Cuisine: American
8. Batty Brownies
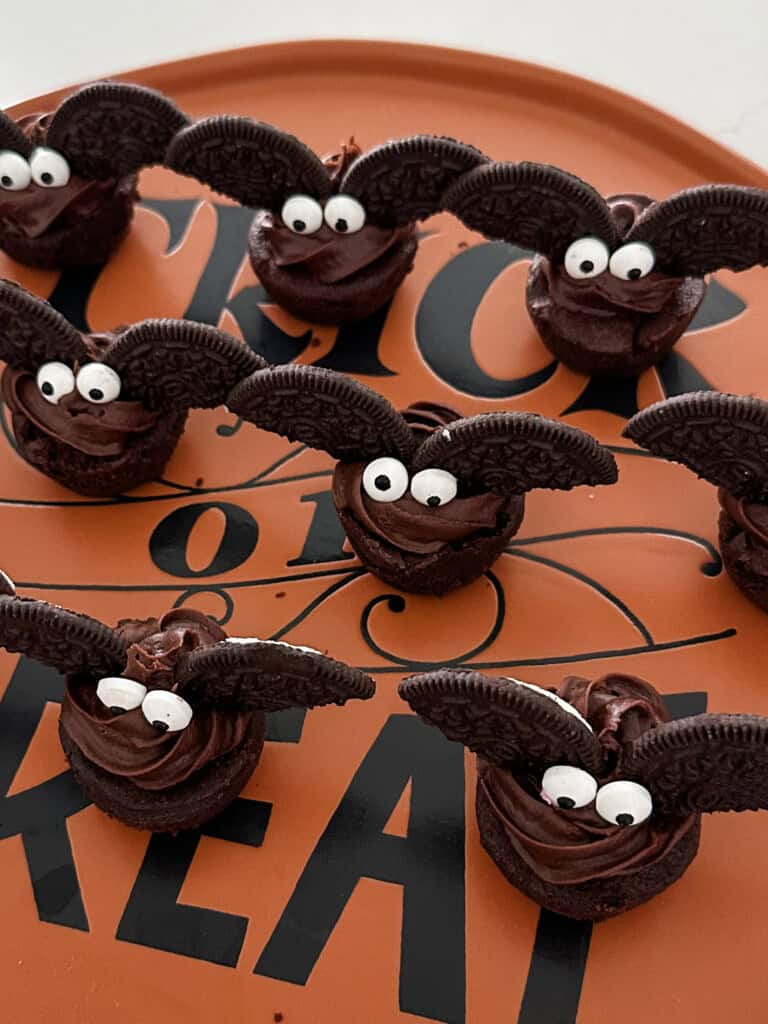
If you’re a chocolate lover like me, then you will go batty for these Batty Brownies. You can always make your own brownies, which I always recommend because they will taste so much better. But if you are limited on time like I was, you can get some mini brownies from the store and whip up this adorable Halloween treat. This one got sooo many compliments!
Print
Batty Brownies
- Total Time: 15 minutes
- Yield: 32 servings
Description
These bat-themed brownies are perfect for a kids Halloween party. If you’re looking for a recipe that is simple to make but will leave your guests in awe, you’ll love this recipe! It’s sure to thrill all little trick-or-treaters.
Ingredients
- mini brownie bites (pre-made at your local grocery store)
- Pillsbury Chocolate Fudge Flavored Ready-to-Use Frosting Bag
- OREO cookies
- candy eyes
Instructions
- Place all of the brownie bites on a platter that you plan to serve.
- Squeeze the chocolate frosting bag and to pipe small swirls on top of each brownie bite.
- Separate the two OREO cookies from each other and cut the circles in half. (You can keep the cookies together, but this makes the “wings” heavier.)
- Place the corners of two semi-circles in the center of the frosting to create wings for the bat.
- Gently press two candy eyes in the center where the two semi-circles meet on the frosting to create a face.
Notes
You can make your own mini brownie bites, which we highly recommend! This is a great alternative if you are short on time.
- Prep Time: 15 minutes
- Category: Desserts
- Cuisine: American
9. Frankenstein Pretzels

My son loves Frankenstein, so when he saw these Frankenstein pretzel treats he freaked out! These are smaller treats that you can’t help but grabbing a handful. They do require a little attention to detail, but they make an impact on the party!
Print
Frankenstein Pretzels
- Total Time: 30 minutes
- Yield: 20 pieces
Description
These Frankenstein Pretzel monster-themed Halloween treats are such a fun and clever treat to make for the family or a party. They didn’t last long in our house and they are spooky cute!
Ingredients
- bag of pretzel squares (snaps)
- bag of pretzel sticks
- candy melts (green and brown)
- candy eyes
Instructions
- Melt approximately 1 cup of green candy melts in a small bowl in the microwave at 50% power for 1 minute or at full power for 30-45 seconds. Stir and then continue microwaving at 50% power for 30 seconds or for 15 seconds at full power at a time until completely melted. (You can check the packaging instructions as well.)
- Optional: Add approximately 1/2 teaspoon to 2 teaspoons cooking oil for a smoother finish. (The more you add, the smoother the finish and the longer the candy melts take to harden on the pretzels, so add slowly!) Stir to combine.
- Dip on pretzel square into the melted candy melts bowl and use a fork to ensure it is completely coated. Then place it on a parchment paper lined baking sheet.
- Snap a pretzel stick into 4 equal pieces. Use two of the pieces to create “bolts” on the sides of Frankenstein’s head and press them into the sides of the coating pretzel square.
- Place two small candy eyes on the pretzel square.
- Repeat this until you have made your desired amount.
- For the hair and mouth, melt approximately 1/4 cup of brown candy melts in a small bowl in the microwave at 50% power for 1 minute or at full power for 30-45 seconds. Stir and then continue microwaving at 50% power for 30 seconds or for 15 seconds at full power at a time until completely melted. (You can check the packaging instructions as well.)
- Once completely melted, pour into a piping bag or sandwich bag and cut the tip. Pipe on the hair and the mouth of Frankenstein using zig-zag method.
- Allow the decorated Frankenstein pretzels to cool at room temperature until firm.
- Category: Desserts
- Cuisine: American
10. Witch Hat Cookies

My kids really enjoyed making these with me. The skill requirement is very minimal, but the fun and taste levels are through the roof! Watch Hocus Pocus while you make these Halloween treats with your kiddos. It’s sure to make some sweet memories.
Print
Witch Hat Cookies
- Total Time: 15 minutes
- Yield: 24 cookies
Description
These witch hat-inspired Halloween cookie treats, topped with chocolate kisses and colorful Halloween-themed sprinkles, are a simple and fun recipe to make with the kids! Perfect for a kids Halloween party or to enjoy at home, be sure to add this one to your list!
Ingredients
- OREO cookies
- milk chocolate (or dark chocolate) Hershey’s Kisses
- candy melts (brown)
- Halloween-themed sprinkles
Instructions
- Melt approximately 1/2 cup of brown candy melts in a small bowl in the microwave at 50% power for 1 minute or at full power for 30-45 seconds. Stir and then continue microwaving at 50% power for 30 seconds or for 15 seconds at full power at a time until completely melted. (You can check the packaging instructions as well.)
- Dip one side of an OREO cookie into the melted candy melts until that side is fully covered.
- Place a Hershey’s kiss in the center of the coated side of the cookie.
- Sprinkle some sprinkles around the Hershey’s kiss on the remaining candy melt coating on the OREO cookie.
- Place the cookie on plate or baking sheet and allow to cool in room temperature until firm.
- Repeat steps 2-5 until you have made your desired amount of Witch Hat Cookies.
- Once firm, enjoy!
- Category: Desserts
- Cuisine: American
The most spooktacular time of the year is quickly creeping up on us, and you’ll want to keep these easy, adorable recipes in your back pocket. Halloween treats don’t have to be uber-fancy or complicated to be crowd-pleasers; these recipes prove it!